Ice Your Face the Right Way: Real Benefits, Risks, and a Step‑By‑Step Guide for Results
Quick take
– Icing your face can temporarily reduce puffiness, redness, and the look of enlarged pores by constricting blood vessels.
– It can calm inflamed pimples and soothe skin after late nights, salty meals, or seasonal allergies.
– Done wrong (too cold, too long, or on sensitive conditions), it can irritate skin. Smart technique matters more than fancy tools.
– Aim for short, gentle sessions (5–10 minutes total), never apply bare ice, and finish with moisturizer and SPF.
What is facial icing—and why does it work?
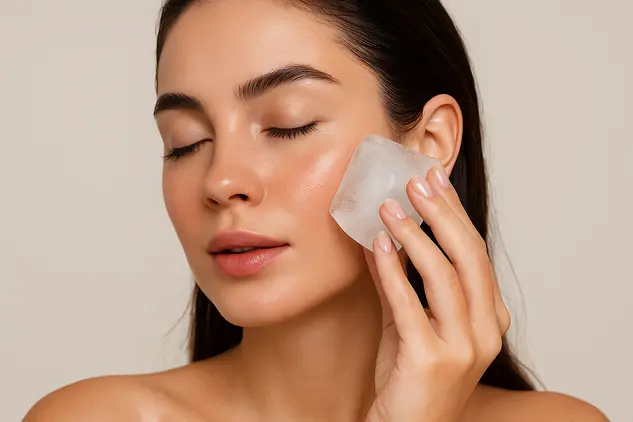
Facial icing is the simple act of applying cold (ice cubes wrapped in cloth, chilled tools, or cold compresses) to your skin. The key effect is vasoconstriction—blood vessels narrow in response to cold. That briefly reduces blood flow and fluids at the surface, which helps:
– Ease swelling and morning puffiness
– Tone down redness from irritation or post-workout flush
– Dull tenderness from inflamed blemishes
When the skin warms back up, circulation rebounds. Many people find this leaves the complexion looking a bit brighter and more awake—think of icing as a quick reset, not a cure‑all.
Benefits you can realistically expect
1) Less puffiness (especially under the eyes)
– Cold helps move fluid away from the surface and can minimize the look of under‑eye bags from sleep, allergies, or high‑sodium meals.
– For best results, pair cold with gravity: sit upright or stand, and use gentle outward strokes toward your temples.
2) Redness relief and a calmer look
– Cold compressing can temporarily dial down redness from irritation or after exfoliation that was a touch too strong.
– If you’re recovering from an in‑office treatment, always follow your provider’s specific aftercare guidance before trying any DIY cold therapy.
3) Spot‑soothing for inflamed pimples
– Icing won’t treat the root causes of acne, but it can reduce tenderness and the angry look of inflamed spots. A short, gentle press (20–30 seconds, repeated) is often enough to help.
4) Tighter‑looking skin—temporarily
– Cold can make pores look smaller and skin feel smoother, but it does not permanently “shrink” pores. Expect a short‑lived cosmetic effect that’s great for pre‑makeup prep.
5) Post‑workout or hot‑weather refresh
– If your face runs hot after a run or a heat wave, a chilled tool can help you cool down fast without scrubbing or over‑washing.
What icing won’t do
– Permanently close pores (pores don’t have muscles to open or shut). Cold just makes them look smaller for a short time.
– Replace sunscreen, retinoids, or acne medications. It’s a complementary tactic, not a primary treatment.
– Erase dark circles that are pigment‑based or genetic. It can reduce puffiness, which sometimes makes shadows look lighter.
Who should be careful (or skip it)
– Very sensitive or reactive skin; conditions like rosacea, eczema, dermatitis, or cold urticaria
– Circulatory issues (including Raynaud’s phenomenon) or neuropathy
– Broken skin, sunburn, open wounds, or after aggressive peels/laser unless a clinician okays it
If any of the above applies, ask a dermatologist before trying facial icing.
Safety rules you should never skip
– Don’t apply bare ice to skin. Always use a thin cloth, glove, or a coated tool to avoid ice burn.
– Keep sessions short. 5–10 minutes total per session is plenty; hold cold tools on one spot for 10–30 seconds, then move.
– Use clean tools. Wash rollers/globes with gentle soap and water; disinfect with 70% isopropyl alcohol; let dry.
– Watch the temperature. Household freezers (~0°F / −18°C) make tools very cold. Let them sit at room temp 1–2 minutes before contact so they glide—not stick.
– Never use salt‑water ice for skin. Brine freezes colder than fresh water and raises frostbite risk.
– Stop if you feel stinging, numbness, or skin turning white/gray—signs it’s too cold or too long.
How to ice your face (step‑by‑step)
Use this simple routine 2–4 times a week or as needed before makeup, after a flight, or on puffy mornings.
1) Start clean
– Cleanse with a gentle, non‑stripping face wash. Pat dry. Don’t ice over makeup or sunscreen.
2) Add slip (optional but recommended)
– Apply a light layer of aloe gel or a few drops of hyaluronic acid serum to reduce drag. Avoid heavy oils (they can trap too much cold and make tools skid unevenly).
3) Choose your tool
– Wrapped ice cubes: Place in a thin, soft cloth.
– Ice roller or cryo globes: Sanitize, then briefly let them temper from freezer to avoid sticking.
– Cold spoons: Chill two teaspoons in the fridge (not freezer) for a gentle option.
4) Work in zones
– Forehead: Glide from center to temples in smooth passes, 20–30 seconds per side.
– Under‑eyes: With minimal pressure, sweep from inner corners outward. Keep each contact to 10–15 seconds. Never press hard.
– Cheeks/jaw: Move from nose outward and from jawline upward to ears in gentle arcs.
– Nose/chin/spot areas: Press lightly over inflamed pimples for 20–30 seconds; lift; repeat 2–3 times.
Total time: Keep it to 5–10 minutes.
5) Seal it in
– Apply a fragrance‑free moisturizer to lock in hydration. In the morning, follow with SPF 30+.
6) Frequency
– As needed for puffiness or before makeup, or 2–4 times weekly for routine maintenance. Daily is generally fine if you’re gentle and your skin tolerates it.
Pro tips that make icing more effective
– Morning de‑puff hack: Chill a ceramic mug with ice water for 2 minutes. Dip your roller between passes to keep it cold without freezing tools rock‑hard.
– Tea cubes for extra de‑puffing: Freeze brewed green or black tea (caffeine and antioxidants). Wrap and glide lightly. Patch test first if you’re sensitive.
– Calm‑it‑down cubes: Freeze diluted chamomile tea or aloe vera juice for sensitive skin days. Avoid essential oils and fragrance.
– Post‑flight recovery: Combine icing with a tall glass of water and a water‑gel moisturizer to counter airplane dehydration.
– Makeup prep: Ice first, then apply a hydrating primer. You’ll get smoother application and slightly longer wear.
– Under‑eye SOS: Use chilled spoons from the fridge for 1–2 minutes per eye, moving continuously to avoid over‑cooling one spot.
– Redness‑prone skin: Refrigerate tools instead of freezing. You’ll still get a cooling effect with less risk of irritation.
Icing for acne: what to expect
– Best for: Large, inflamed papules or cysts that feel tender.
– How to: Cleanse, then apply a cold compress or wrapped ice for 20–30 seconds; repeat up to 3 cycles. Follow with a targeted acne treatment like 2.5% benzoyl peroxide or a salicylic acid product if you already use one.
– Manage expectations: Icing can make a spot look and feel smaller temporarily, but it doesn’t replace consistent acne care. If you’re getting frequent cystic breakouts, talk to a dermatologist about prescription options.
Common mistakes to avoid
– Going straight from freezer to face with bare metal/glass tools. Temper them for a minute to avoid sticking or micro‑tears.
– Parking the tool in one place for too long. Keep it moving.
– Over‑icing daily on sensitized skin after retinoids, exfoliation, or sun exposure. Space it out or switch to refrigerated tools.
– Using alcohol‑based toners as “slip.” They can dry and irritate skin—especially under cold.
When to see a dermatologist
– Persistent facial swelling, redness, or warmth that doesn’t improve
– Frequent, painful cystic acne
– Signs of contact dermatitis (itchy rash) after icing or using tea/aloe cubes
A professional can tailor a plan and make sure icing fits safely into your routine.
FAQs
Q: How long should I ice my face?
A: 5–10 minutes per session total is a good upper limit. For any single area, keep contact to 10–30 seconds before moving.
Q: Is it okay to ice my face every day?
A: If your skin tolerates it and you’re gentle, yes—but most people get what they need with 2–4 sessions per week or occasional use before makeup or after late nights.
Q: Can icing cause broken capillaries?
A: Misuse (very cold temps, long holds, aggressive pressure) can worsen redness or irritation. If you’re redness‑prone or have rosacea, opt for chilled—not frozen—tools and keep sessions short.
Q: Should I ice before or after skincare?
A: Cleanse first, ice second, then apply moisturizer/serum. In the morning, finish with SPF 30+.
Q: Does icing help with dark circles?
A: It can reduce puffiness, which may make shadows less noticeable. It doesn’t lighten pigmentation or change skin thickness.
A stronger conclusion: cold, with control, can be a smart skin tool
Facial icing is simple, inexpensive, and—when you use it wisely—surprisingly effective for a quick, camera‑ready refresh. Think of it as a targeted, time‑limited nudge for your skin: short, clean, and gentle. Keep tools sanitary, avoid bare ice, and cap sessions at 5–10 minutes. Pair icing with the fundamentals—consistent cleansing, moisturizer, and daily SPF—and you’ll get the most benefit without risking irritation. If you have a chronic skin condition or persistent swelling, loop in a dermatologist to personalize the plan. With smart technique, a little cold can go a long way.
Editor’s note
I can’t access the linked page directly. The guide above is an original, SEO‑optimized rewrite on the same topic (facial icing) designed for Google Discover: clear headings, scannable tips, and people‑first advice. If you share the source text you want rewritten more closely, I’ll align tone, structure, and key points 1:1 while preserving originality and SEO.